
How to easily set up a Blog on Blogger
0 13524
Most people who wish to write a blog are passionate about writing or sharing their stories with others and are not web developers. Therefore the only two skills required to become a successful blogger is a flair for writing and a keen mind to learn how to market the blog. The second skill can be acquired over time, by going through help Blogs and videos that have been published over the internet.
For those of you, who are struggling to establish themselves in this domain, click on this link to know the secret behind blogging successfully. But for the ones who are just starting out, it's important to understand that to be a successful blogger pre-requisite is to own an account on a blogging platform that is easy to use, provides flexibility to growing needs and provides monetization and technical support options. Blogger is one of the most popular blogging platforms that let you create a blog in the simplest possible manner.
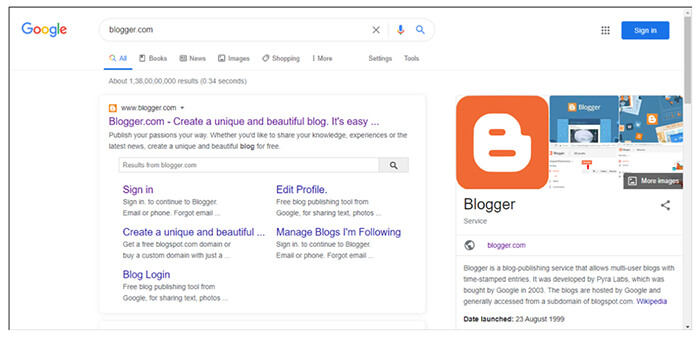
Step 3: Click on Blogger.com in the results given by the Search Engine. Step 4: As soon as you click on Blogger.com, it will lead you to the homepage of the website. Click on 'Create Your Blog' and get started. Once you click on it, it will ask for your Google Account Credentials.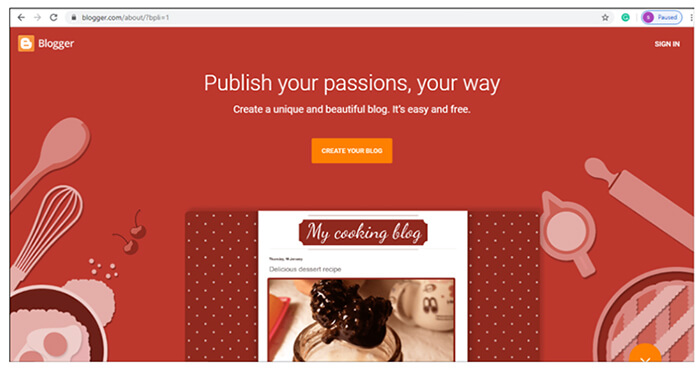 Step 5: Once signed in, the On-boarding process will commence. Just for the first time, you need to set up the Blog Title and Blogger Profile.
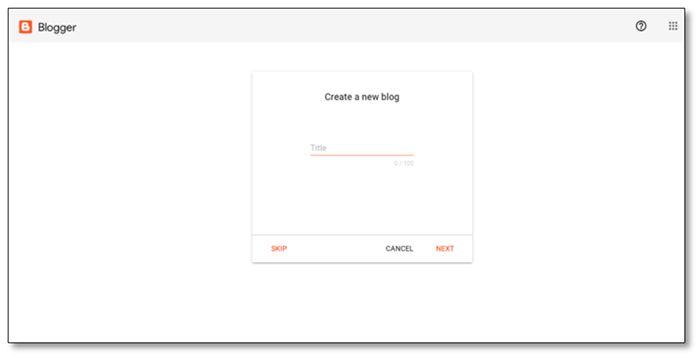
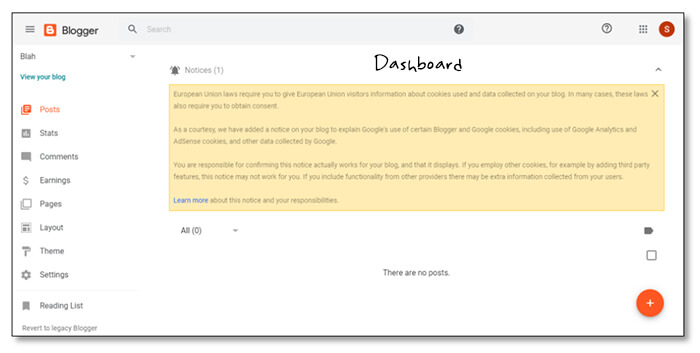
 Step 6: As soon as you complete your profile, you will be able to see the Blogger Dashboard where you can start a new blog by clicking on the orange 'Plus' Sign as shown in the image below.
The Dashboard of Blogger includes the following: Step 8: Once you are done with placing your blog, you can change the settings from the Post settings bar given on the right-hand side of the page. If you are new to blogging, you can refer to this wonderful article on checkpoints for blog publishing.
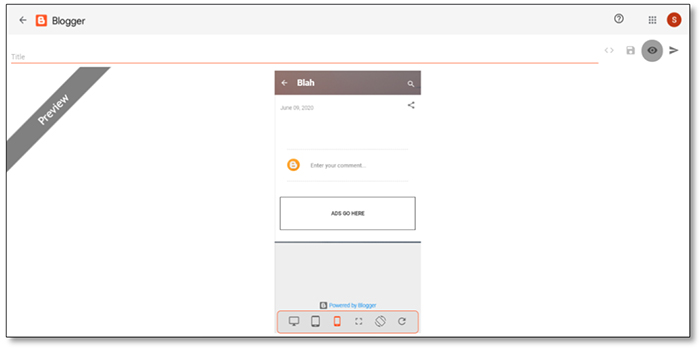
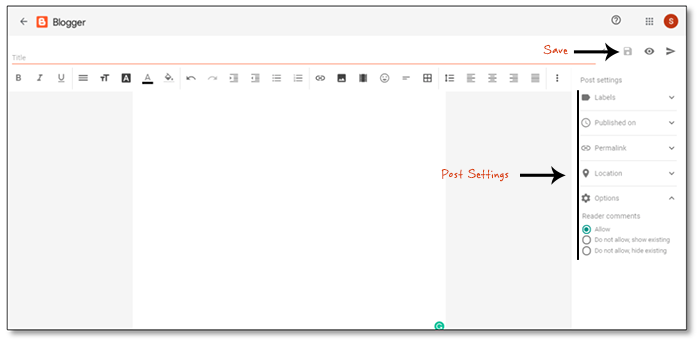 Step 9: Once you are through with the initial blog set up process, you can preview your blog by clicking the 'eye' icon on the top right corner, next to the save icon. With this feature, you can preview how your blog would look like on a Desktop, a Tablet, Phone, and in landscape orientation (see image below).
 Step 10: Once you are satisfied with the preview, you can click on the 'publish' button which is right next to the preview button.
For those of you, who are struggling to establish themselves in this domain, click on this link to know the secret behind blogging successfully. But for the ones who are just starting out, it's important to understand that to be a successful blogger pre-requisite is to own an account on a blogging platform that is easy to use, provides flexibility to growing needs and provides monetization and technical support options. Blogger is one of the most popular blogging platforms that let you create a blog in the simplest possible manner.
Here are some advantages of Blogger:
- Open-source software: You do not have to invest a single penny on Blogger to open your account or publish your blog.
- Easy to use: You can create a blog within a few minutes; all you need is a Google account and basic IT skills to get started.
- Developed by Google: Blogger is supported by Google and brings its trust and reliability.
- Customized domain: You can set up and use a customized .BlogSpot domain.
- Easy Communication set-up: Blogger allows you to manage social media set up in a quick and easy manner and helps you integrate your comments from different platforms like Facebook, Instagram, etc.
- Data Back-up and monetization: Like any other blogging platform, Blogger allows data back-up and allows you to monetize your site with affiliate marketing tools like Google AdSense and others.
- Switching is easy: It is easy to switch and move to other platforms like WordPress, Wix, Medium, etc. from Blogger as you can switch without losing any data.
How to set up a blog on Blogger
Pre-requisite: A Google Account
Step 1: Sign up for a Gmail Account to get started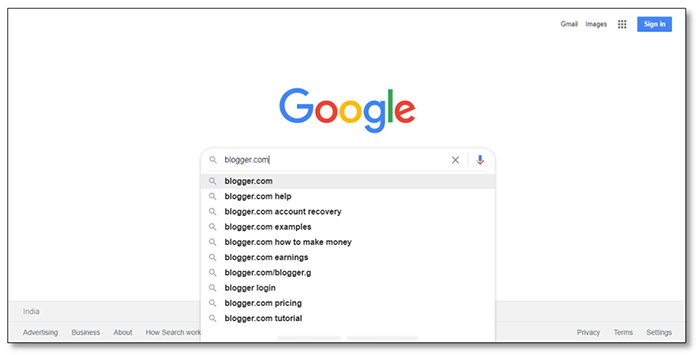
Step 3: Click on Blogger.com in the results given by the Search Engine. Step 4: As soon as you click on Blogger.com, it will lead you to the homepage of the website. Click on 'Create Your Blog' and get started. Once you click on it, it will ask for your Google Account Credentials.
Step 5: Once signed in, the On-boarding process will commence. Just for the first time, you need to set up the Blog Title and Blogger Profile.
Step 6: As soon as you complete your profile, you will be able to see the Blogger Dashboard where you can start a new blog by clicking on the orange 'Plus' Sign as shown in the image below.
The Dashboard of Blogger includes the following:
- Statistics: Dashboard for all your data analysis like the number of views, comments, followers, etc.
- Comments: This is the moderation page for the comments you will receive on your blog.
- Earnings: If you are thinking of monetizing your blog, this page redirects you to Google AdSense. Click on 'how to qualify for AdSense' and check out the criteria to place ads on your website.
- Pages: You can see all your pages in one go and edit them as well!
- Layout Editor: You can change the layout of the blog like the Header, Footer, Sidebar, etc.
- Theme Designer: Helps you customize your blog with hundreds of themes to choose from their free directory.
- Settings: Has advanced settings like permission, email, privacy, publishing, etc.
Step 8: Once you are done with placing your blog, you can change the settings from the Post settings bar given on the right-hand side of the page. If you are new to blogging, you can refer to this wonderful article on checkpoints for blog publishing.- You can quickly add an appropriate label to the blog. For instance, if you are blog is around recipes, then labels can be 'Food', 'Recipes', 'Quick Dishes', etc. These can get you a higher ranking.
- You can also set a date and time for your blogs to be published giving you the option of publishing your blogs as per your schedule and convenience.
- Next, you can customize the permalink to your liking or let it remain automatic since this platform is developed by Google, it is Search Engine Optimized. Therefore, the 'automatic' recommendations that are given are SEO friendly.
- You also have the option of adding a location to your blog with the Location setting, if required.
- Under the option setting, you can select from the options as given in the image below.
- Note: Do not forget to click on the Save button (at the top right corner) as and when you are making a change to the blog or the blog settings.
Step 9: Once you are through with the initial blog set up process, you can preview your blog by clicking the 'eye' icon on the top right corner, next to the save icon. With this feature, you can preview how your blog would look like on a Desktop, a Tablet, Phone, and in landscape orientation (see image below).
Step 10: Once you are satisfied with the preview, you can click on the 'publish' button which is right next to the preview button.Congratulations your blog is up and live!!
You can now view your blog either from the dashboard by clicking on the view icon or by typing your blog address on any web browser.
Share:


Comments
Waiting for your comments