
Upload file using CodeIgniter
0 3400
To upload a file in Codeigniter, we need to use some helpers and inbuilt libraries. A file can be an image, gif, video, pdf, etc.
Related Topics:
 Step 2 Open the application/views directory and create a view file upload_view.php which contains a form for file uploading.
upload_view.php
Step 2 Open the application/views directory and create a view file upload_view.php which contains a form for file uploading.
upload_view.php
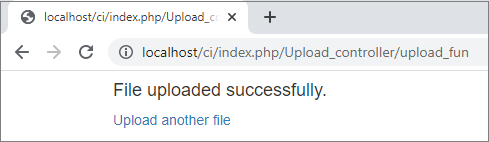
Step 3 In the application/views directory, create another view file upload_success_view.php. This file is used to display the success message after the file uploading. upload_success_view.php
Step 4 Now, open the application/controllers directory and create a controller file Upload_controller.php. In this file, we will use two library form_validation and upload and two helper URL and form. Upload_controller.php
Step 5 Open the given URL into the browser to see the result.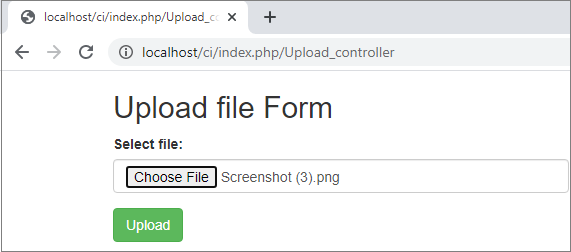 Select the file and click on the Upload button to upload that on your server.
Related Topics:
Codeigniter Interview Questions
CodeIgniter Application Architecture
CodeIgniter MVC Framework
Uploading a File:
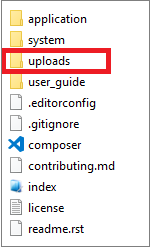
To upload a file, follow the below steps: Step 1 Create a folder "uploads" on the root directory of your application. This folder will contain all uploaded files.
Step 2 Open the application/views directory and create a view file upload_view.php which contains a form for file uploading.
upload_view.php<!DOCTYPE html>
<html>
<head>
<meta name="viewport" content="width=device-width, initial-scale=1">
<link rel="stylesheet" href="https://maxcdn.bootstrapcdn.com/bootstrap/3.4.1/css/bootstrap.min.css">
<script src="https://ajax.googleapis.com/ajax/libs/jquery/3.5.1/jquery.min.js"></script>
<script src="https://maxcdn.bootstrapcdn.com/bootstrap/3.4.1/js/bootstrap.min.js"></script>
</head>
<body>
<div class="container">
<h2>Upload file Form</h2>
<?php echo $error;?>
<?php echo form_open_multipart('http://localhost/ci/index.php/Upload_controller/upload_fun');?>
<form method="post" enctype="multipart/formdata">
<div class="form-group" style="width:40%">
<label for="class">Select file:</label>
<input type="file" class="form-control" name="file" >
</div>
<input type="submit" name="upload" class="btn btn-success" value="Upload"/>
</form>
</div>
</body>
</html>
Step 3 In the application/views directory, create another view file upload_success_view.php. This file is used to display the success message after the file uploading. upload_success_view.php
<!DOCTYPE html>
<html>
<head>
  <meta name="viewport" content="width=device-width, initial-scale=1">
  <link rel="stylesheet" href="https://maxcdn.bootstrapcdn.com/bootstrap/3.4.1/css/bootstrap.min.css">
  <script src="https://ajax.googleapis.com/ajax/libs/jquery/3.5.1/jquery.min.js"></script>
  <script src="https://maxcdn.bootstrapcdn.com/bootstrap/3.4.1/js/bootstrap.min.js"></script>
</head>
<body>

<<div class="container">
  <h4>File uploaded successfully.</h4>
  <a href="">Upload another file</a>
</div>

</body>
</html>
Step 4 Now, open the application/controllers directory and create a controller file Upload_controller.php. In this file, we will use two library form_validation and upload and two helper URL and form. Upload_controller.php
<?php

class Upload_controller extends CI_Controller {

      public function __construct() {
        parent::__construct();
        $this->load->helper(array('form', 'url'));
      }

      public function index() {
        $this->load->view('upload_view', array('error' => ' ' ));
      }

      public function upload_fun() {
        $config['upload_path'] = './uploads/';
        $config['allowed_types'] = 'gif|jpg|png';
        $config['max_size'] = 100000;
        $config['max_width'] = 1768;
        $config['max_height'] = 768;
        $this->load->library('upload', $config);

        if ( ! $this->upload->do_upload('file')) {
          $error = array('error' => $this->upload->display_errors());
          $this->load->view('upload_view', $error);
        }

          else {
            $this->load->view('upload_success_view');
        }
      }
    }
?>
Step 5 Open the given URL into the browser to see the result.
http://localhost/ci/index.php/Upload_controller
Select the file and click on the Upload button to upload that on your server.

Share:


Comments
Waiting for your comments