
How to verify (Blue Mark) the Facebook Business Page
by Devender
0 3757
Getting a Blue mark on Facebook is quite a big thing. It means that Facebook has verified you as a genuine celebrity or business with a Facebook page. It’s not a badge that anyone or everyone can have. There is a criterion that one needs to fulfill in order to qualify for this Blue mark.
Does that Blue badge also attract you? Well, it gives a classy look to any page, while making you look authentic to people. So, how do you get it? First, you need to file a request to Facebook for getting that badge. It is a simple process to request Facebook for the blue badge but getting it is an entirely different thing. Facebook will verify every detail you provide and only after satisfaction, they will provide you that badge.
Let’s understand what criteria one needs to fulfill to even qualify for that blue badge. Even some big models/celebrities or business pages fail to get verified because there is no algorithm to get it done. Facebook will verify everything and then only one gets that Blue mark everyone is eager to get. So, if you are also looking to get verified on Facebook and get that Blue badge but don’t know where to begin, then we are here to help you.
Requirements to apply for a verified Blue badge:
Facebook will look at several factors to evaluate your page to determine if you fulfill all its verification criteria. Some other things also qualify as a requirement for getting verified.
- Authenticity:
- Unique:
- Information:
- Remarkable:
Your page must be authentic and represent a person, business, or entity.
The Page should be Unique for a business or a person as Facebook only verifies one account per business/person. Although, there are a few exceptions available for language-specified accounts.
Your page must have all the information about the business, the about me section, a clear profile picture, and at least one post.
Your page must be notable and representing a well-known business that people are already searching for. Facebook will look for any news article about your business to evaluate your importance. So, it will be a plus point if your business is already in news but not by paid promotions or advertisements.
If you fulfill this criterion, only then you should apply for getting verified, or else it’s just wasting time. So if you fulfill this criterion, then let’s see how to request Facebook for this Blue Badge or getting verified.
How to verify a Facebook Business Page?
All you need to do is fill a form to get the Blue badge. Facebook will verify your details and then only if satisfied, it will give your page that badge. So, let’s see how to fill this form and from where to get it.
1 Pull up the form.
You can open the contact form by just clicking here.

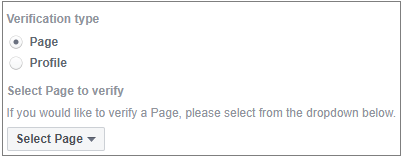
2 Choose the verification type and select the page.
This is self-explanatory; all you need to do is to choose between Page and profile. Then, Choose the Page you want to get verified.
3 Select a category.
Now, you have to select a category for your business from the drop-down list.
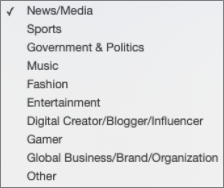
There are many options available such as News/Media, Sports, Government & Politics, Music, Fashion, Entertainment, Digital creator/Blogger/Influencer, Gamer, Global Business/Brand/Organization, Other. If you can’t find the category of your business just choose "other".
4 Enter your country.
Enter your business’s country of origin.

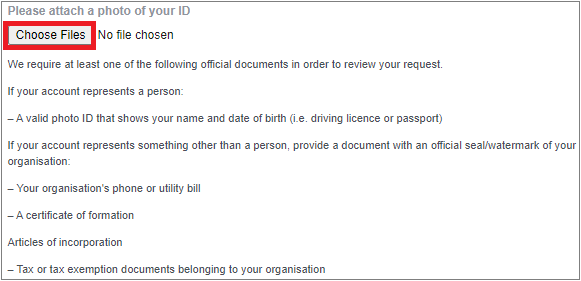
5 Upload a photo of your Identification Document.
Now, you need to attach a photo of your ID. The acceptable list of IDs is mentioned just below. Read carefully before choosing an ID. A simple mistake will cost you your Blue badge and waste your time.
6 Explain why this identification is required.
All you need to do is explain to Facebook why you need this Blue badge or get verified.
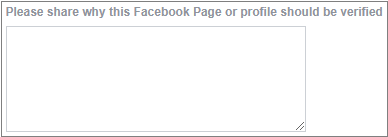
The best explanation will be that there are a lot of fan pages with the same name and you want your page to stand out but being original is the key here. So, just write whatever reason you find best to explain it.
7 Optional stuff and press send.
Now you will come across two optional sections: other social media accounts and additional comments. You can choose to leave both or either one blank but it will be better to just fill both sections.
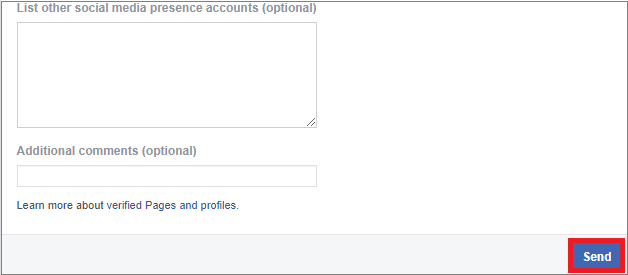
When you are done just click the "Send" option at the bottom of the page. Now, all you have to do is wait for Facebook to do its deeds and verify your page.
A few things you need to remember before applying for the Blue badge:
- It can’t be bought
- Don’t provide any false information
- It can be taken away
Now, you have learned how you can get verified or get that Blue badge for your page on Facebook. If you like this information, please share it and subscribe to our free newsletter.

Share:
You May Also Like


Discount Coupons


Expand Your Business Reach


Comments
Waiting for your comments