
How to put Watermark to a Picture
by Devender
0 2815
In this internet era, everything is changing around us making things easy and accessible to everyone. There were times when a sign meant a lot whether it came from a celebrity or some other personality but now, you can get anybody’s signature over the internet and the same can be said about images. Every image available on the Internet is up for grabs. So, what does one do to save their images?
The best option will be to use watermarks on your images. That brings us to the question: What is a Watermark?
Don’t get yourself confused with the name. It is a simple thing, a Watermark is a kind of mark or a symbol/logo/name put on an image/object with great transparency to show the ownership of that image/object. It is used to stamp your name or any other identification mark on the image making it authentic to only yourself. It can also be a simple way to sign your art thus, preventing it from getting stolen over the internet.
Every day we come across many cases where small artists stole other’s artwork and made it public defining it as theirs and hence got all the fame for it. In the digital world, you always have to find a way to keep all your data private. So,
- Do you want to keep your photos safe from being stolen?
- Are you looking to put watermarks on your images?
- Do you wish to sign everything you make?
If yes, then Watermark is the way forward. It will save you from any digital fraud and keep your art or images safe. You must be wondering how to put it in your photos. Well, worry not! We will discuss everything related to Watermarks today. So, just tag along and understand this simple process.
How to put a Watermark on a picture?
There are millions of options available on the internet when you search for putting a watermark on your photo but not all are reliable or easy to use. So, we did the entire search for you and came up with the best, free and simplest one.
1 Go to watermarkly.com
Visit the site by clicking this link watermarkly.com.
2 Click on the "Watermark photos for free" link.
Scroll down and you will find the link to add a watermark to your photos.

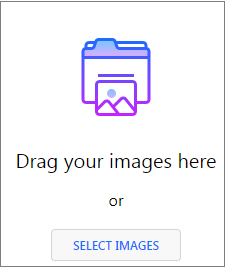
3 Select the image.
Now, either drag the photo you want to edit here or choose one from your drive, computer, or elsewhere.
4 Click on the "Next step" option.
Now, you will see the "next step" alternative in the top right corner. Click on it to move forward.

5 Add text or logo.
Now, choose between adding a logo or text your image. If you already have a logo, then use that, or else you can choose to add text to your image.

6 Customize your image and watermark.
Now, you get to customize the watermark and your image. A variety of options are available for you.
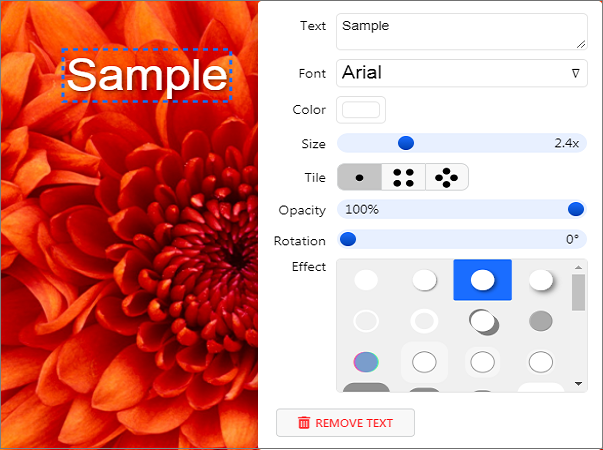
You get to choose the transparency of the logo, the shape, size, color, font, rotation, and so on.
Make your watermark unique and click on the "watermark images" option available on the right top corner of your screen.

7 Preview and select quality.
Select the "Preview watermark" option to see the image and if you are satisfied with it then, select the quality of the image and click on the "watermark image" option, and your image will be ready to download.
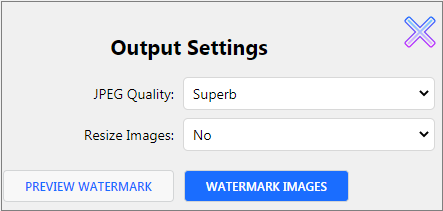
If you want to re-size your image, you get the option to do that too.
After downloading your image will be ready with a watermark and it will be uniquely yours to use. Now, enjoy it because nobody will be able to remove this watermark and these fraudsters will think twice before even trying to steal your art.
If you are still with us then, you have learned the process to create a watermark on your pictures. We hope you liked this information and would love to hear from you. Don’t forget to subscribe to our free newsletter.

Share:
You May Also Like


Discount Coupons


Expand Your Business Reach


Comments
Waiting for your comments