
How to create groups in Facebook
by Devender
0 3900
- Are you looking to create a group on Facebook?
- Do you wish to connect with like-minded people like you?
- Are you trying to build your community?
If your answer to the above questions is "Yes", then, Facebook groups are for you. So do you know how to create a group on Facebook? If no, then we are here to help you. Today, we will show you how you can create a group on Facebook.
Facebook groups are the place to connect with people having the same mindset as you. It serves a lot of purposes like marketing a business on Facebook. It is an exclusive group for the people of your choice to communicate, share and stay in touch. But people often confuse Facebook groups with Facebook pages. Just for clarity, both can serve the same purpose but both are entirely different.
So, if you are interested in creating a Group on Facebook for any purpose, you are at the right place. Let’s get started and understand how to create a group.
How to create groups on Facebook?
A group can be easily created using your phone or any other device you prefer. The process also remains the same. So, let’s start with step 1.
1 Open Facebook.
The first and foremost thing to do is to open Facebook on your device and logging in to your account.
2 Click the "+" icon.
On the top right corner of your screen, you will find this plus icon. Click on this "+" icon to get started.

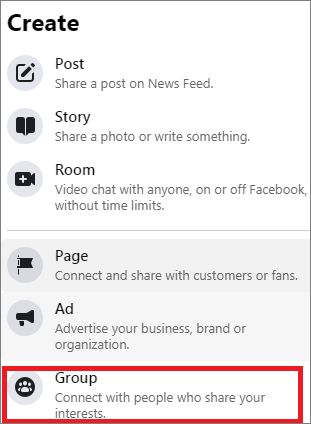
3 Select the "Group" option.
A menu bar will open when you click the plus sign. In this menu bar, scroll down until you find the "Group" option.
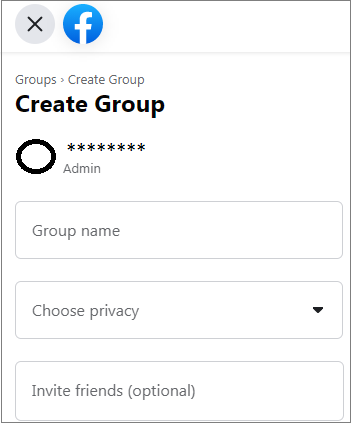
4 Give your group a name.
Selecting "Group" will direct you to a new window. In this new window, you will need to give your group a name.
5 Select privacy.
The next step will be to select privacy for your group. Click on the drop-down list and select one of the two options.
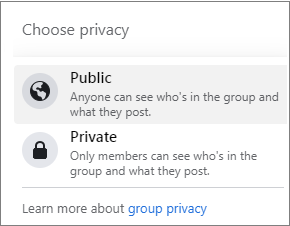
If you wish to keep your Group private to people only you invite to join, then choose the Private option. But if you want to make more crowd and find people who have the same mindset as you, you should keep it to the public. Keeping it public will let everyone see your group. The best thing is if you are unsure, then choose any of the two options and you can change it later too.
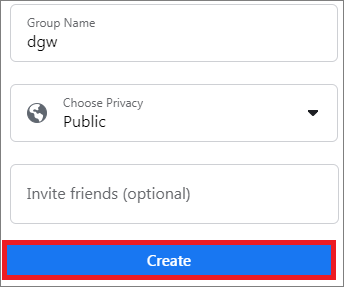
You will also get the option to invite your friends to your group here.
6 Click on the "Create" button.
At last, you just need to click the "Create" button at the bottom of the page and your group will be created.
If you choose to follow these 6 easy steps; you will have a Facebook group for yourself. Well, creating a Facebook group is not the hard part. What comes after creating it is the hard part that is maintaining it and inviting people to join it. It will be a great idea if you make a strategy to popularize your group before creating one.
If you are still with us, then, you have learned to create a group on Facebook. Now, have fun and interact with people who are like you. If you like this information, please share it and subscribe to our free mail letter.

Share:
You May Also Like


Discount Coupons


Expand Your Business Reach


Comments
Waiting for your comments